So we had a shipment delivered…but…they are all going out again over the next 2 days, none left at CEL-UK. You can still buy from our resellers http://www.cel-robox.com/where-to-buy/
I think it might be the schools buying them all, maybe dentists, maybe both….oh no, maybe it is DENTAL SCHOOLS!
We are making more. If this keeps up we might need to cancel warehouse leave…or get the engineers to do some physical labour 😀
A key driver of desktop 3D printing technology adoption over the last few years has been the proliferation of completely free 3D modelling tools that are, crucially, user-friendly and extremely high quality. Since these tools are such powerful enablers of 3D printing technology and, during meetings with customers, I often end up sharing my thoughts on the merits of various 3D modelling software tools anyway, I considered I should offer a short summary of tools I use personally and would recommend for use with any 3D printer.
Each tool listed here performs distinct tasks in the 3D modelling process so there’s no overlap of functions between them. The purpose of this list is purely to inform of the tools that I use personally, not to offer any kind of comparison. Some more advanced users may scoff at my 3D modelling arsenal, but I’d ask that they bear in mind my non-engineering background. Despite my novice experience and skills, I’ve found that the following tools work very well together to do pretty much anything I want to do – from designing high-precision mechanisms to personalising Xmas gifts. All of these software tools are free to use because, like most people, I don’t like spending money when I don’t have to.
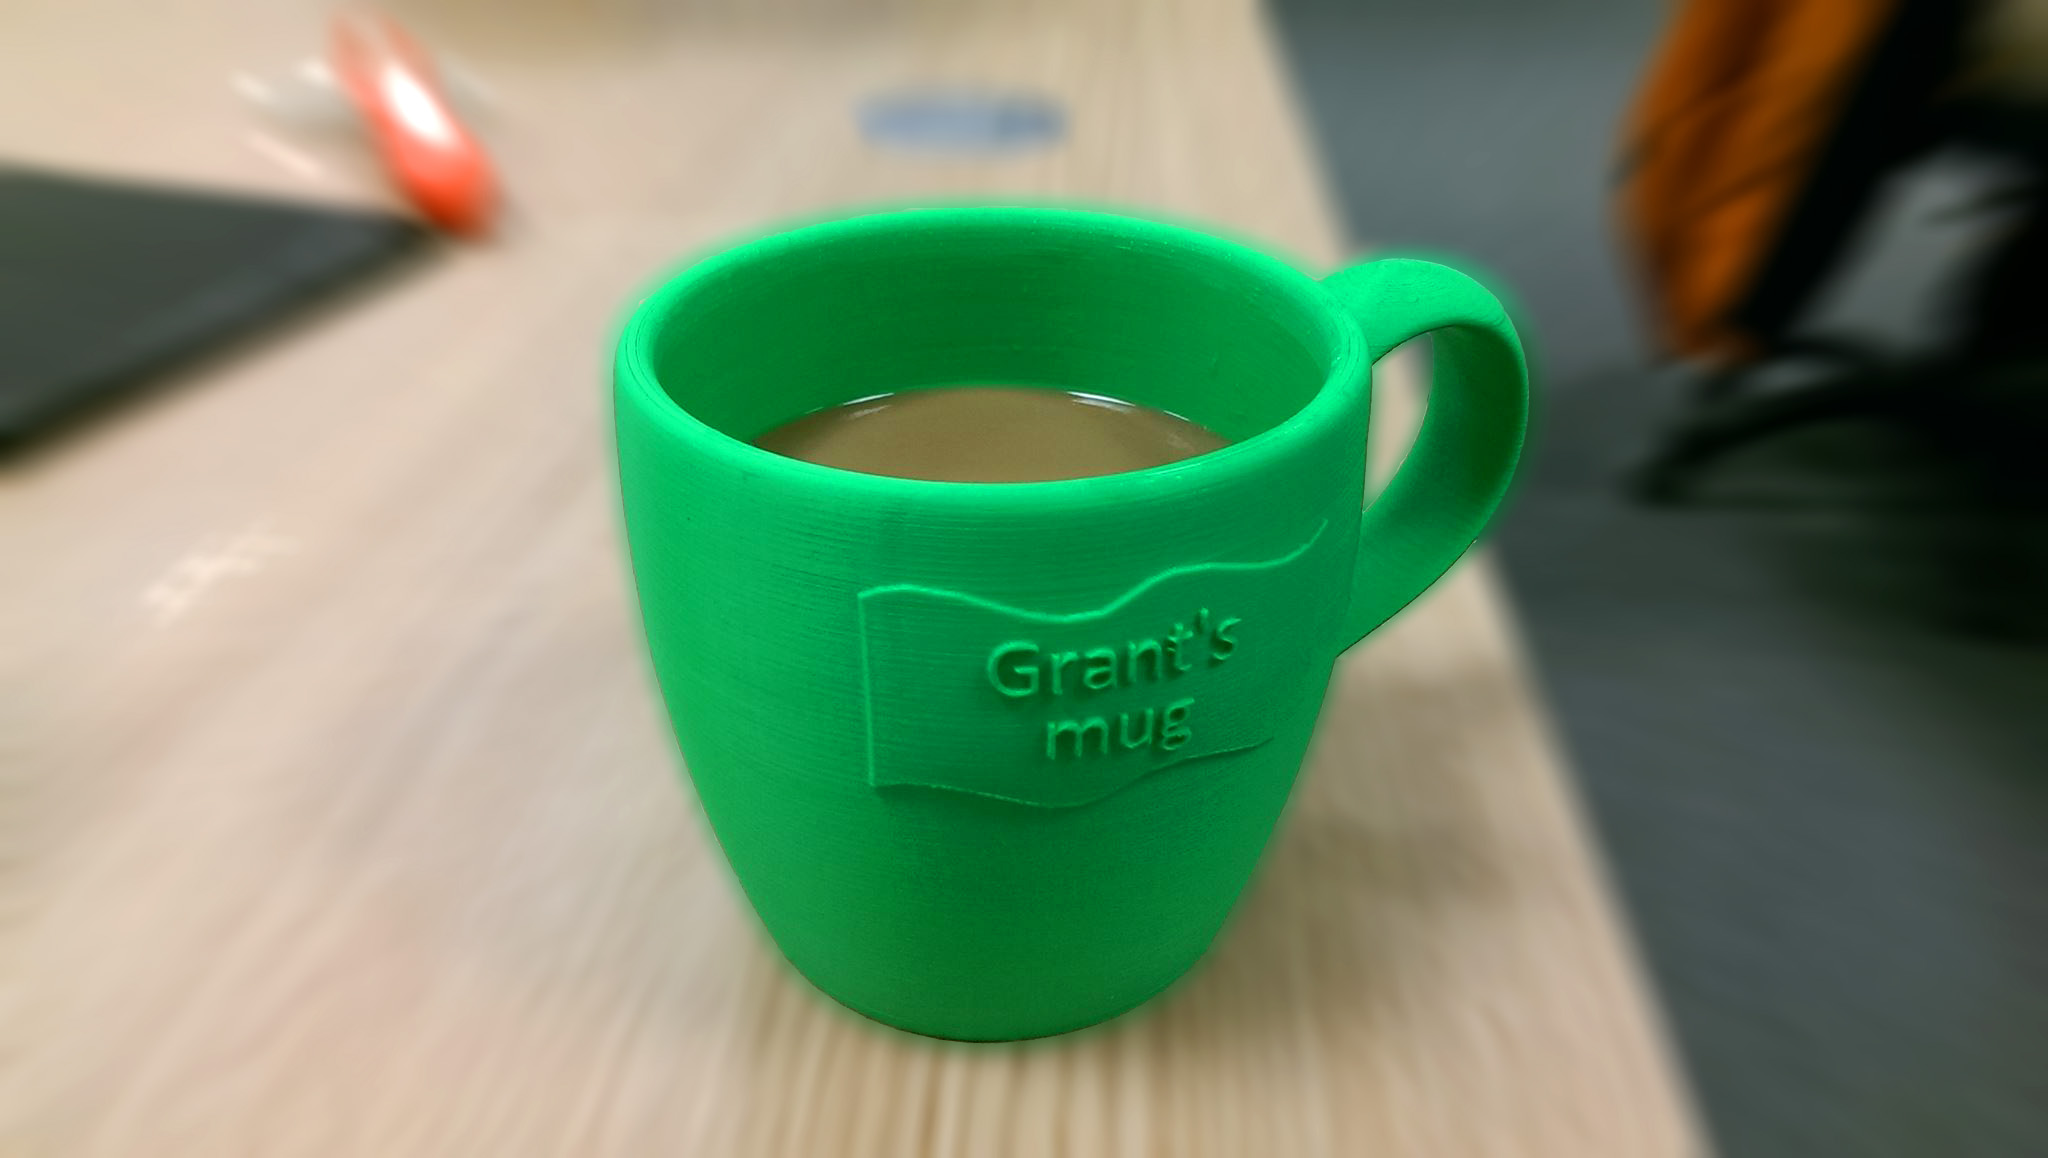
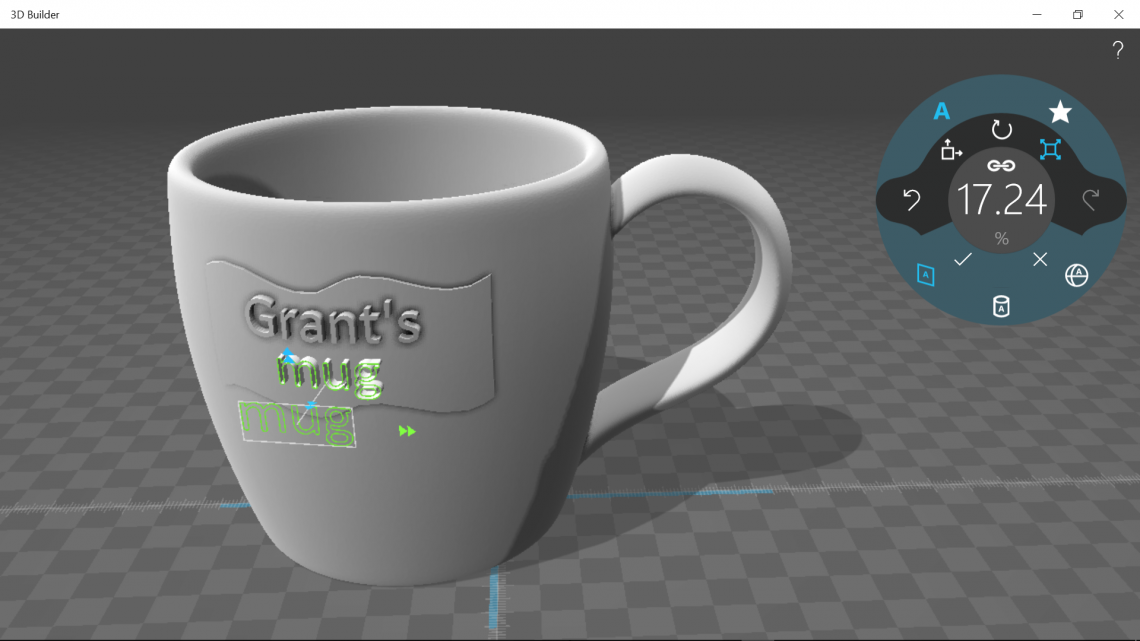
I use this tool from Microsoft all the time to edit 3D models as it has the cleanest, most user-friendly interface of any 3D modelling tool I’ve used. It looks and feels great, especially when I use it to demonstrate how easy it is to customise and personalise any one of the thousands of free 3D models available from online repositories such as Thingiverse or MyMiniFactory (the latter is integrated into Robox’s AutoMaker software). While 3D Builder is in its element when used to emboss text, logos and other images, it’s equally superb in other areas such as splitting and resizing large models into smaller parts.
This is another free tool that I use all the time, but for creating 3D models rather than editing them. 123D Design is made by Autodesk and, as a result, it’s clean, simple and easy to use with a range of features that satisfies virtually all of my modelling needs. While it lacks most of the advanced features found in 3D modelling software tools such as SolidWorks or Autodesk Inventor, it does boast a key feature not found in most expensive 3D modelling tools – the ability to save to the cloud.
I frequently recommend 123D Design since it’s completely free and offers versatile, powerful functionality with an interface suitable for novices and professionals alike. Its high quality is thanks to it being made by one of the best 3D software development companies in the world, which also happens to make the next 3D modelling tool on this list.
Meshmixer is my tool of choice for touching up 3D models. The thing I like most about Meshmixer is the way that models can be sculpted naturally by pulling and pushing on surfaces or cutting parts of a model away. Packed with a wide range of versatile, powerful features which perform extremely useful functions such as smoothing and distorting a surface or hollowing out a model, Autodesk’s Meshmixer is an essential tool in my box of freebies.
An important point to note is that Meshmixer is used to edit organic, rather than geometric, models. An organic model consists of natural, flowing curves and shapes whereas a geometric model is one that comprises perfect, uniform shapes that don’t often appear in nature. The model created in 123D Design above, for example, from geometric shapes such as rectangles, triangles and circles wouldn’t edit well in Meshmixer. However, models captured from 3D scans, such as the duck below, are perfect for editing with this tool, which brings me to yet another Autodesk product…
The final free 3D modelling tool on this list is, without a doubt, the most accessible 3D scanning tool out there. Again, it’s completely free but, unlike the other software listed here, it’s designed to be used on a mobile device such as a smartphone or tablet computer. 123D Catch is an extremely cost-effective (free!) and convenient alternative to dedicated handheld 3D scanning equipment, which starts at around £300 and typically looks like something airport security would get out if you set off a metal detector. I’ve used the app to scan people, objects, buildings, you name it. The app is easy to use and can produce good quality scans, which can be improved further and touched up using Meshmixer. The only drawback to this app is the length of time it takes for photos to be uploaded to Autodesk and processed. It can be a little frustrating – especially if you have poor mobile phone signal! – but I understand frustration to be a feature of all current handheld 3D scanning technologies to a greater or lesser extent.
I did consider adding a fifth 3D modelling tool to this list since 4 is an unusual number to end a list on, but since these four tools take up around 95% of my 3D modelling time I didn’t feel it was appropriate to add another. Tinkercad would most likely have been the fifth free tool , which you can see in action below:
The combined value of this small collection of tools is considerably more than the sum of its parts. When used together, these apps can transform any 3D printer from a novelty to magic. Although I’m currently experimenting with more heavy duty 3D modelling software such as SpaceClaim (I’ve received a free trial) and may end up adding more software to this list, for now I think I’ll be sticking with the free stuff.
Please note: CEL has no commercial ties with Autodesk. They just so happen to make a great suite of free 3D modelling tools.
We’re delighted to see Robox taking pride of place in Technology Supplies’ new 2016-2017 Design & Technology Catalogue as the first product in the CAD/CAM section. Having been awarded the #1 position in a section including 26 other 3D printers, and with over 7k printed catalogues now in circulation, we’d like to thank the team at Technology Supplies for playing their part in helping to make Robox the leading 3D printer for education.
For over 30 years Technology Supplies has been supplying innovative Design and Technology products, services and solutions to over 17,000 educators worldwide. They are a leading supplier for 4,275 UK secondary schools but also cater to primary and higher education.
It was always going to be a little ambitious reporting on our coverage monthly, and as 2016 has been as busy, if not busier than any other year so far, we’ve failed spectacularly to shout from the rooftops about the ongoing coverage we’ve been enjoying across the widest-read online 3D printing publications.
At Robox we’re always trying to use our imaginations to secure coverage which is a little different and an opportunity came up last month to get involved in an event run by UK Coffee Week. The Robox team were keen to get involved and so designed some unique limited edition coffee stencils of Stephen Fry’s face to be distributed during the week. Luckily for us, this also resulted a nice bit of exposure online too.
In addition to quirky ‘stunts’ and piggybacking news events we’re also passionate about getting Robox more established in the education sector. We’re already making great progress with the 3D printer now present in many schools across the UK and we’re working closely with the James Dyson Foundation to promote STEM in schools. This is why MD Chris Elsworthy was more than happy to be interviewed by Education Technology for a piece on technology and innovation in the classroom.
Chris has also been talking to ITProPortal about how small businesses can use and make the most out of 3D printing, which has resulted in the following piece of coverage:
And of course, part of the reason we’ve been so busy this year is following our attendance at CES and the launch of the dual material head, which is currently being rolled out to loyal customers who placed back-orders – both of which secured a wealth of good coverage.
Getting to grips with 3D design using free software
Martyn Hendry at St Andrew's Primary School takes a group of 10-year-old pupils through the process of designing custom name tags using Autodesk's browser-based Tinkercad software.
Students of all ages at King Edward VI Community College and its feeder schools use Robox in combination with other manufacturing processes such as cold casting.
Students from Writhlington School provide 3D printer workshops to Rwandan students.
Robox began to make real inroads into key markets last year following the success of our Kickstarter campaign. The desktop 3D printer market has grown strongly and matured since the first commercial Robox units went on sale in December 2014 and I’d like to share some of the valuable insights we’ve gained into how 3D printers are being used today. This is the first in a series of blog posts I’ll be writing on the subject and my inaugural post will be focusing on the education sector.
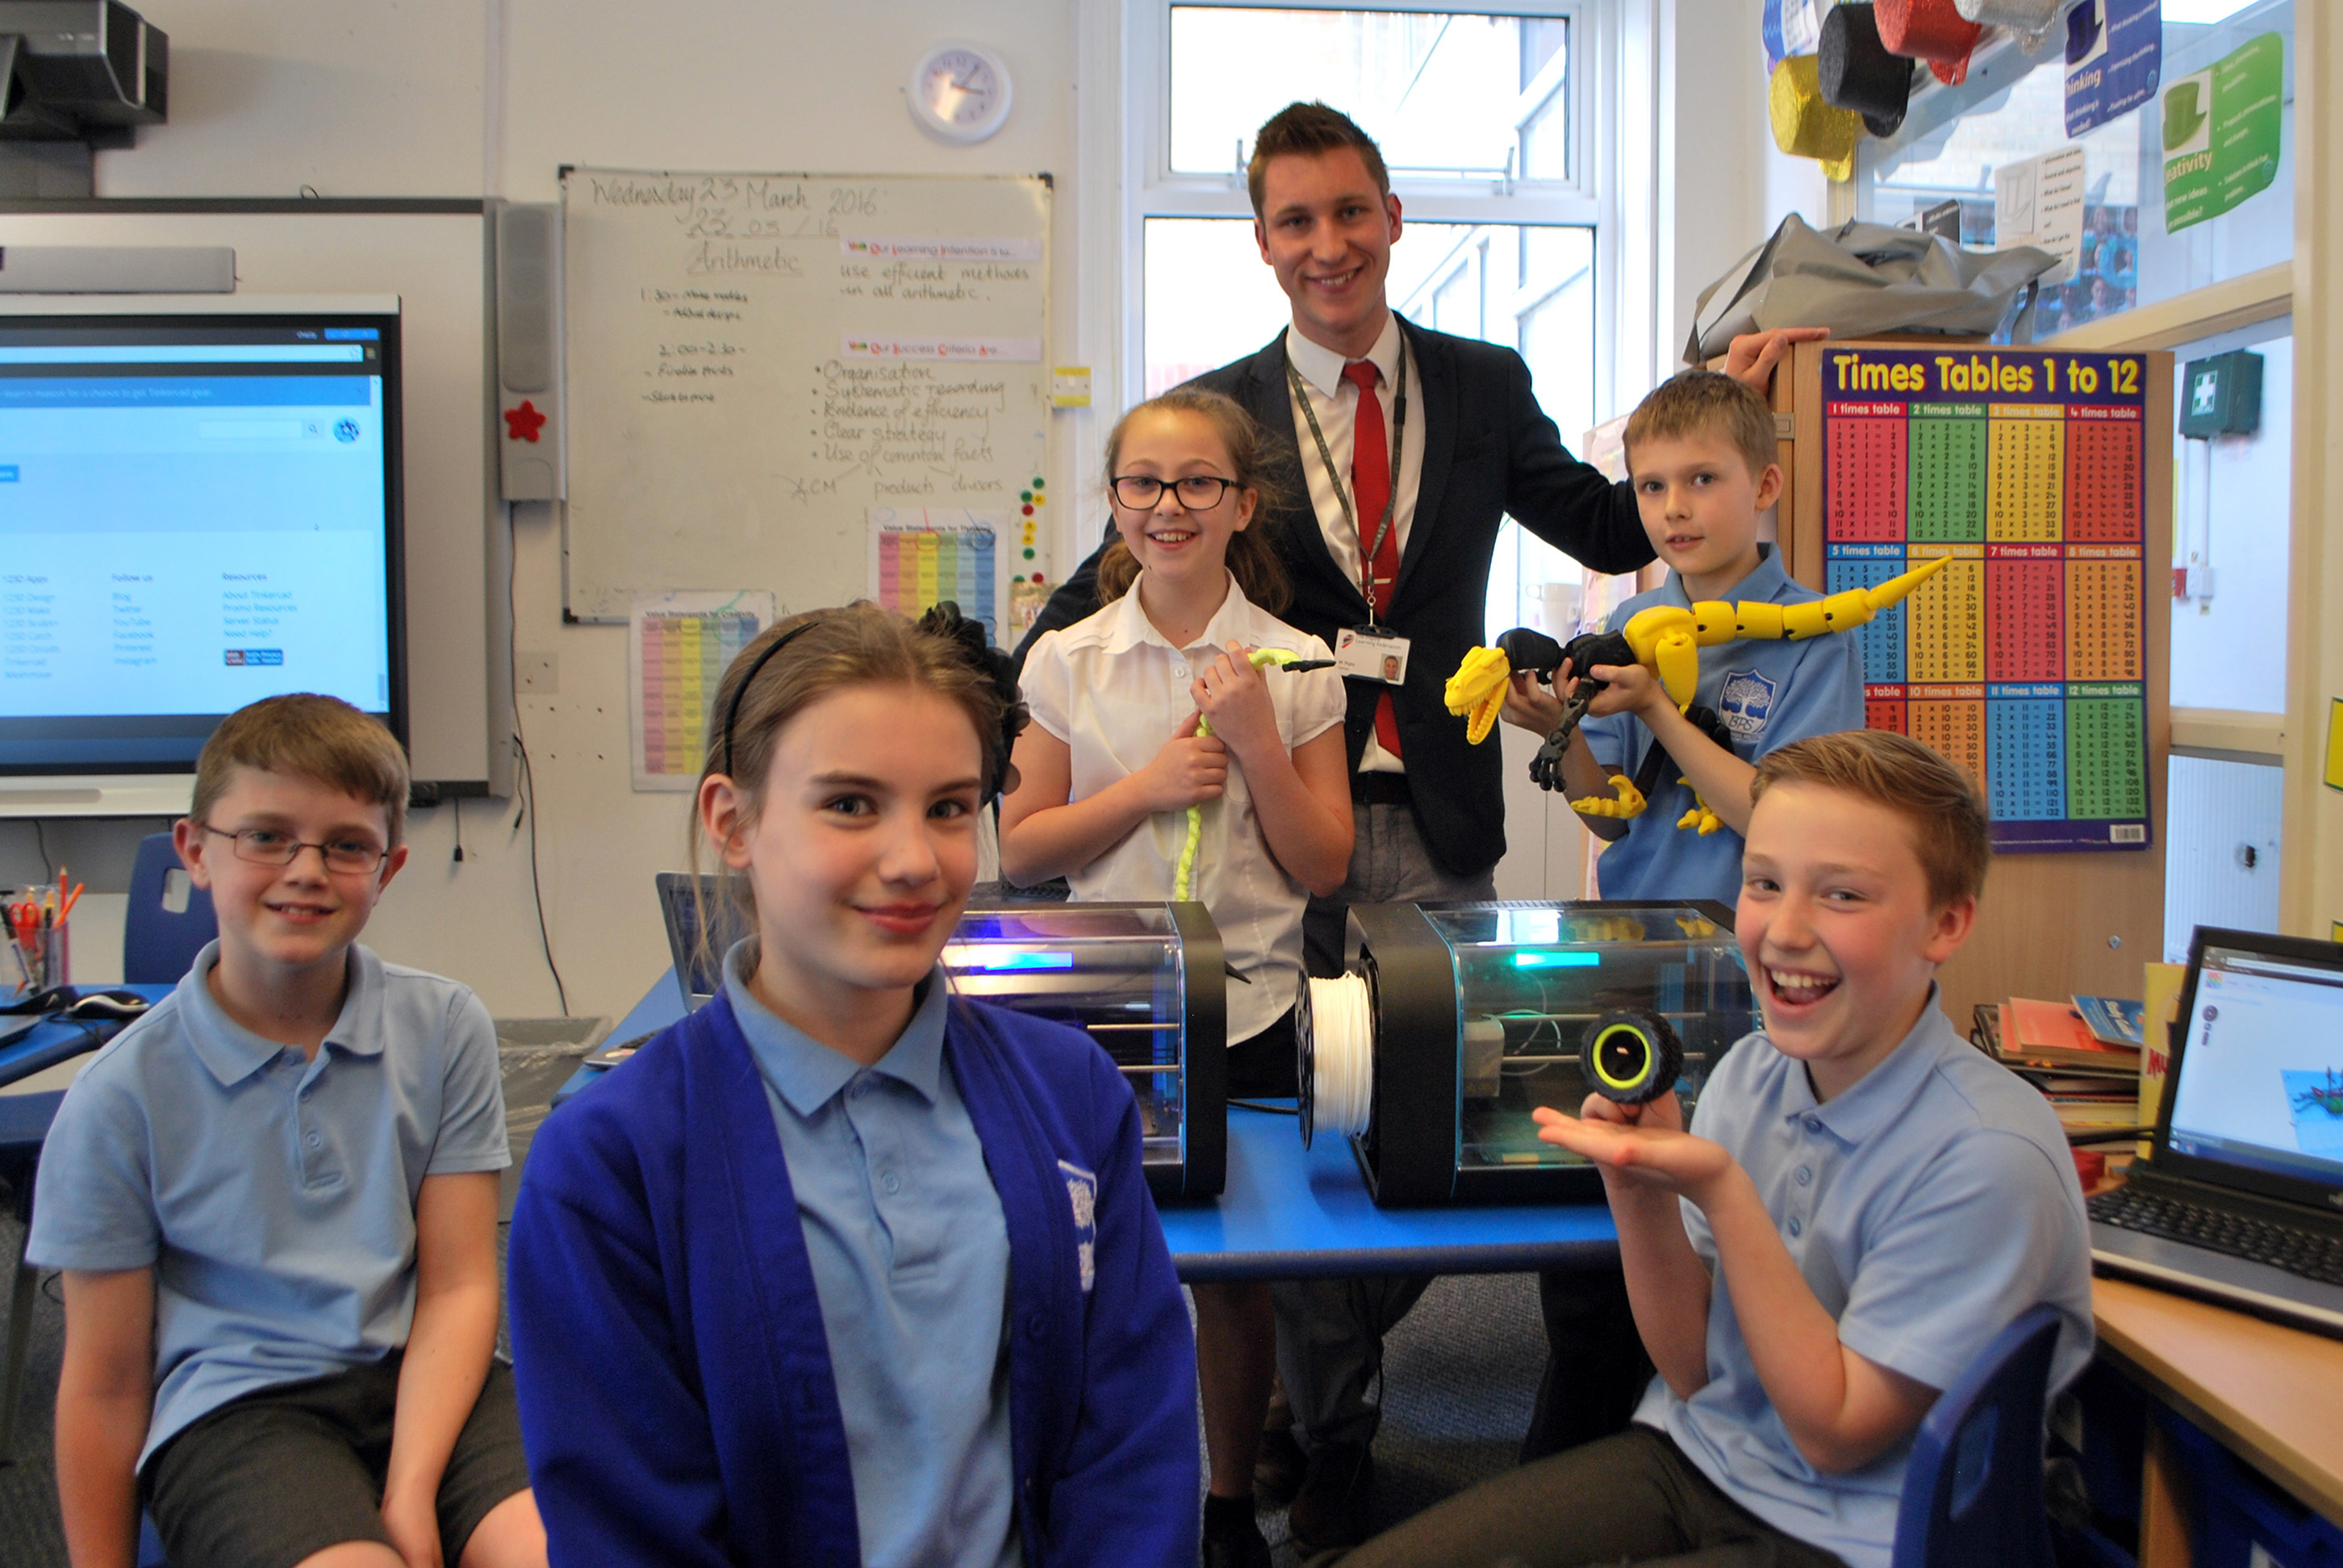
As CEL’s Robox sales manager, I can be found either in our head office near Bristol, which is packed full of 3D printers and some of the latest Robox tech being developed by our R&D team, or travelling the country supporting our resellers and their customers. As 2015 progressed, I found myself visiting schools using Robox more and more frequently, talking to teachers and students about 3D printers and learning about the innovative ways many schools use Robox in the classroom.
Robox’s success in the education sector follows two projects in recent years funded by the Department for Education (DfE) to identify good uses for 3D printers in schools. In 2012-13, 21 schools were asked to explore innovative ways of using the technology to help with teaching complex scientific and mathematical ideas. Feedback from this project confirmed that 3D printers have significant potential as a teaching resource and, as a result, the DfE funded a more detailed project in 2014-15 exploring how 3D printers can be used to enhance science, technology, engineering and mathematics (STEM) teaching. While still highly encouraging, the results of this more in-depth study highlighted the degree to which positive impact on pupil engagement and understanding relies on 3D printers being used in lessons in effective and meaningful ways.
3D printers are almost exclusively used in design & technology (D&T) departments in secondary schools because they’re naturally a great fit for the subject, helping to break down barriers between designing and manufacturing, inspire young people to invent and think creatively. Although there will be opportunities in the future for 3D printers to be used in other departments such as geography and history – to create 3D maps and recreate historical artefacts, for example – the benefits of the technology are seen most acutely in classrooms with D&T teachers that are confident using new technology and combine elements of science, technology, engineering and maths in their lessons.
We work with the James Dyson Foundation to promote STEM in schools and our partner schools have done an excellent job integrating Robox into their curricula to enhance teaching in these subjects. They increasingly see Robox not only as a valuable learning tool, but as a means of exciting students and engaging them more effectively with STEM subjects.
The new National Curriculum for D&T, which has been updated for first teaching in 2017, places a strong emphasis on the use of cutting-edge equipment to inform pupils’ understanding of industry and provides ample opportunity for students to learn about 3D printing.
Part of the reason Robox is proving so successful in schools is because it’s the only desktop 3D printer with an interlocking safety door, making it the safest option for use around children. It’s also compact and a number of schools using Robox are taking advantage of its form factor to benefit from the dramatically increased capacity and speed enabled by the use of multiple units at the same time. Robox’s cost-effectiveness, both in terms of initial investment and ongoing material costs, plays a critical role in making it a feasible option for schools considering such an investment in building their 3D printing capacity.
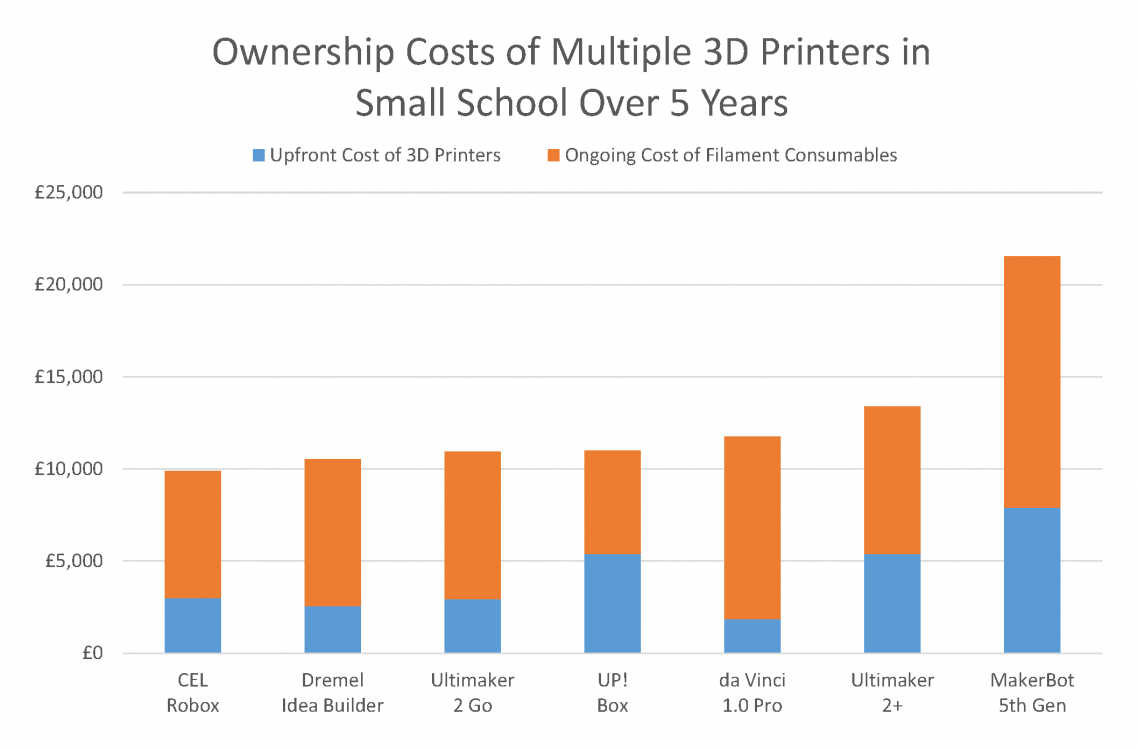
As schools decide which technology in their classrooms to procure and how best to spend their overall budgets, the ownership costs of any new technology over its lifetime should be considered carefully. Even if a school were to use only three 3D printers (some schools are using as many as 10 Roboxes), it would stand to make significant savings with Robox to the tune of £thousands while also benefiting from the platform’s enhanced safety features, accessibility and professional quality.
Although other 3D printers may at first glance appear to be better value for money – boasting either a lower RRP or cheaper filament – when both initial and ongoing costs are taken into account Robox always comes out on top (the chart above doesn’t even take into account that, unlike the vast majority of 3D printers, Robox doesn’t lock users into using specific consumables à la HP in the 2D printer world).
We’re really excited to be having such a positive impact in schools around the country with Robox and in partnership with the James Dyson Foundation. If you’d like to learn more about Robox or what we’re doing, or if you have any comments, please feel free to get in touch.
Note: 3D printer unit costs based on on MSRP. PLA filament costs obtained from manufacturer websites or recommended reseller websites if manufacturer does not sell directly to customers in the UK. All costs correct at time of writing on 20 April, 2016.
“Sir, is that a 3D printer?” I enquired, “Yes Al, let’s unpack it and see if we can get it working. Are you free after school?” That was the start of it. We took the Robox out of its packaging followed the quick start-up guide and 3D printed our first ever product in under an hour. The product itself was a very small pyramid from the sample files but it was a very definite, very successful start. I’m liking this already!
Like most D&T departments in state schools, the acquiring and implementation of new technologies and equipment is something that has to be carefully managed and justified in budgets. One of the first markers for whether a piece of equipment is worthwhile is the question of impact. On Open Evening Al chose to run the Robox for 4 hours producing a much larger and more complex model. The interest from prospective students, current students, parents and staff was incredible. The feedback sheets from the evening consistently noted two amazing things seen at Open Evening; the brand new sports hall and the 3D printer in D&T.
Stage one, impact, tick!
“Stage two Sir?”, “Yes Al, stage two”. Can I use it in class as a useful piece of equipment in the Product Design students’ tool box? The department already has a small laser cutter and a vinyl cutter that are used relentlessly. In order to test this out Mr Nicholson ‘gave me the keys’ to take it for a proper spin, designing and making. I’m on the AS D&T Graphic Products course and I’m at the design stage of a project to design and model an ‘outdoor’ classroom to be set in the school grounds. I downloaded a free copy of Autodesk-123D and set about the scale model. The bed of the Robox is about A5 and my card model was considerably bigger. The 3D print would be too small if I made it fit the bed so I chose to use the 100mm Z axis and the A5 bed as a start point. I split the model into 8 pieces, 6 of which were doubles (keeping the design modular really helps when you’re using CAM!). I ran the Robox all day and overnight, carefully removing the pieces from the machine’s bed. I used a 10% infill for the blocks so that they would be rigid but not use up too much of the PLA filament. I could stick them together to form the completed model but it’s more useful at the moment for me to have them in smaller blocks so that they fit in my school bag!
I’m not used to D&T being quite this straightforward!
At the point where a number of schools were considering the future of their D&T departments, for financial reasons, Ashlyns were determined to keep the breadth of curriculum and the enrichment that D&T offers. The subject was allied into a Faculty structure with Computer Science and Business Studies. The cross-linking between these three quite different subjects is growing by the day and at its heart is creativity and enterprise, ably assisted of course by control technology, software and CAM. The Faculty’s results have gone from strength to strength as the interest builds and the ‘newer’ technologies are introduced and take their place alongside the traditional. I use the word ‘alongside’ for various reasons. Can I afford a whole class of 3D printers? Would I want to? The answer to both is no. Firstly, I could have bought 10 Robox machines for the price I paid for the laser cutter but then students make so much use of the laser cutter, so quickly and with such a variety of materials. Secondly, every new piece of technology adds another dimension to the subject and doesn’t need to replace anything, older methods often employ a more appropriate level of technology.
However, ask me the question “Would I like more Robox machines in my classrooms?” the answer would be 100% “Yes!”
Most D&T A’ Level courses still have a 50% restriction on how much of the final work can be manufactured using CAD/CAM. Possibly to make sure that traditional skills are still developed or to enable a more level playing field for students from different socio-economic backgrounds, the restrictions are there and may well still be there after the introduction of the new specifications. Has that stopped us from using other forms of CAD/CAM in the past? Of course not, life without the laser cutter doesn’t bear thinking about and as the necessity to increase the students’ exposure to newer technologies for example through the NC 2014 it will need to become part and parcel of what we do. With the NC 2014 in mind, the opportunities to develop some designs based on biomimicry is next on my list!
Before getting the Robox I used to trot out a number of reasons why the department wouldn’t need a 3D printer, mainly based around speed, size restriction, cost but the truth is that you just need to be a bit creative with how it gets used and as always the D&T community is full of ideas and ways forward. The following are a few that have sprung to mind. Firstly, everyone designs and then the class vote for which one gets made (and sometimes those still interested can come back at lunchtime or after school to get theirs made!). Secondly, smaller multiple designs that can fit on the same machine bed. Thirdly, increase the number of machines. I already have systems in place to help replace cookers and sewing machines so I just need to add them to the list and buy half-a-machine per year (or ask the school association!). Lastly, the Robox is a very portable machine and has already been at home with me.
The rapid set-up and zero clamping means that the files just need to be left to get on with manufacturing!
It has to be said that the efficiency of the material consumed is financially useful and the outcomes even on draft resolution are easily enough to portray the detail required. With new materials coming online, that go beyond the already available plethora of colours, such as rubber and dissolvable media, the future is brightly coloured and very flexible!
Mark Nicholson and Al Cox Ashlyns School
Berkhamsted
“We’ve been using our CEL Robox for about a month now and in that short space of time children as young as 8 have been able to design, create and print 3D models from their own imaginations. The AutoMaker software supplied with the printer is clear and simple to operate with the time of print, price and weight a fantastic feature for education settings. The children have got to grips with it so quickly and can now work independently on their designs. All of this combined with hardware that’s incredibly safe and user-friendly to operate, the CEL Robox is exactly what our academy needs to take our Design and Technology to the next level.”
Josh Rigby
Year 6 Teacher and Design and Technology Lead Inspire Learning Federation